Sidequest

Drawing Pipes

Pipe Entity

Lets create a new Pipe entity:

1
import { SpriteData } from "#/components/sprite-data";
2
import { Vector2d } from "#/components/vector2d";
3
import { Game } from "#/game";
4
5
type PipeOptions = {
6
game: Game;
7
position: Vector2d;
8
rimSpriteData: SpriteData;
9
sliceSpriteData: SpriteData;
10
spriteSheet: HTMLImageElement;
11
type: "top" | "bottom";
12
};
13
14
export class Pipe {
15
game: Game;
16
position: Vector2d;
17
rimSpriteData: SpriteData;
18
sliceSpriteData: SpriteData;
19
spriteSheet: HTMLImageElement;
20
type: "top" | "bottom";
21
22
constructor(options: PipeOptions) {
23
this.game = options.game;
24
this.position = options.position;
25
this.rimSpriteData = options.rimSpriteData;
26
this.sliceSpriteData = options.sliceSpriteData;
27
this.spriteSheet = options.spriteSheet;
28
this.type = options.type;
29
}
30
31
public draw(context: CanvasRenderingContext2D) {}
32
}

Not much new here except our usage of a TypeScript union type.

Pipe Positioning

Before we instantiate our pipes, I want to talk a little bit about how we're going to position them. We'll describe the positions relative to the center of the canvas - which will later be substituted for our spawn point. More importantly, relative to the y position of the center of the canvas. I call out y because later we'll spawn the pipes off screen in x so they can scroll into the gameplay area.

This feels more intuitive than describing the top left corners of the images we'll be drawing. The pipes will handle the details in the draw method.

This diagram demonstrates the positioning of the pipes:

Pipes positioning diagram

With that, let's instantiate our pipes:

1
import spriteSheetUrl from "#/assets/image/spritesheet.png";
2
import { BoxCollider } from "#/components/box-collider";
3
import { CircleCollider } from "#/components/circle-collider";
4
import { SpriteAnimation } from "#/components/sprite-animation";
5
import { SpriteAnimationDetails } from "#/components/sprite-animation-details";
6
import { SpriteData } from "#/components/sprite-data";
7
import { Vector2d } from "#/components/vector2d";
8
import { config } from "#/config";
9
import { Bird } from "#/entities/bird";
10
import { Ground } from "#/entities/ground";
+
import { Pipe } from "#/entities/pipe";
12
import { Game, GameState } from "#/game";
13
import { loadImage } from "#/lib/asset-loader";
14
import { circleRectangleIntersects } from "#/lib/collision";
15
import { spriteMap } from "#/sprite-map";
16
17
// ...
18
+
const pipeTop = new Pipe({
+
game,
+
position: new Vector2d(
+
config.gameWidth / 2 - spriteMap.pipes.green.slice.width / 2,
+
config.gameHeight / 2 - 50
+
),
+
rimSpriteData: spriteMap.pipes.green.bottom,
+
sliceSpriteData: spriteMap.pipes.green.slice,
+
spriteSheet,
+
type: "top",
+
});
+
+
const pipeBottom = new Pipe({
+
game,
+
position: new Vector2d(
+
config.gameWidth / 2 - spriteMap.pipes.green.slice.width / 2,
+
config.gameHeight / 2 + 50
+
),
+
rimSpriteData: spriteMap.pipes.green.top,
+
sliceSpriteData: spriteMap.pipes.green.slice,
+
spriteSheet,
+
type: "bottom",
+
});
42
43
let last = performance.now();
44
45
// ...

Note our positions. For the top and bottom pipe, we use the same x position of: config.gameWidth / 2 - spriteMap.pipes.green.slice.width / 2. Half the game width minus half the width of the slice sprite.

The y position is very similar. Half the game height plus/minus the buffer of 50 pixels.

Note that we pass the rim sprite data that is opposite the pipe type. So when we draw a top pipe, we draw the bottom rim sprite, and vice versa.

Drawing a Few Helpers

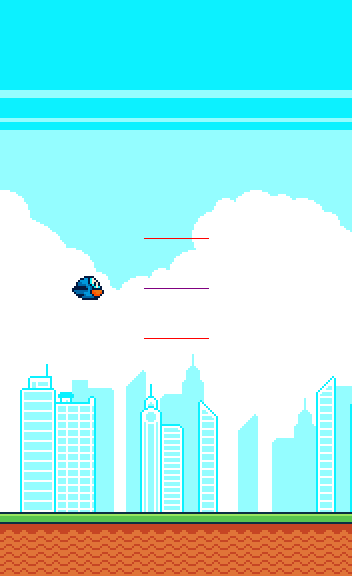
Let's add a few reference lines to the canvas to help make sure we get our positioning correct.

Add this after the ground.draw(context) within the frame function:

1
const x = config.gameWidth / 2 - spriteMap.pipes.green.slice.width / 2;
2
const y = config.gameHeight / 2;
3
const buffer = 50;
4
const lineLength = 65;
5
6
// Where the bottom of the top pipe will be
7
context.fillStyle = "red";
8
context.fillRect(x, y - buffer, lineLength, 1);
9
// Center of the canvas (our spawn point)
10
context.fillStyle = "purple";
11
context.fillRect(x, y, lineLength, 1);
12
// Where the top of the bottom pipe will be
13
context.fillStyle = "red";
14
context.fillRect(x, y + buffer, lineLength, 1);

You should now see three lines drawn on the canvas:

Pipes reference lines diagram

The Height Property

Before we can finally draw the pipes, we need to know the height of the pipe. We have all the information needed, we just need to determine and store the value in the Pipe class:

1
export class Pipe {
+
height: number;
3
game: Game;
4
position: Vector2d;
5
rimSpriteData: SpriteData;
6
sliceSpriteData: SpriteData;
7
spriteSheet: HTMLImageElement;
8
type: "top" | "bottom";
9
10
constructor(options: PipeOptions) {
11
this.game = options.game;
12
this.position = options.position;
13
this.rimSpriteData = options.rimSpriteData;
14
this.sliceSpriteData = options.sliceSpriteData;
15
this.spriteSheet = options.spriteSheet;
16
this.type = options.type;
17
+
this.height =
+
this.type === "top"
+
? this.position.y
+
: this.game.config.gameHeight - this.position.y;
22
}
23
24
public draw(context: CanvasRenderingContext2D) {}
25
}

When we are drawing the top pipe, we want the height to be the distance from the top of the canvas (0) to the y position. Or just position.y, since that's the same value.

When we are drawing the bottom pipe, we want the height to be the distance from the bottom of the canvas (config.gameHeight) to the y position, so we subtract.

The reference lines we drew earlier can help you visualize that distance. We can finally draw the pipes!

Drawing the Pipe Rims

Let's add our pipe draw calls to the frame function:

1
bird.draw(context);
+
pipeTop.draw(context);
+
pipeBottom.draw(context);
4
ground.draw(context);

We haven't done anything to draw the pipes yet. We'll add the logic in the draw method next.

Let's start with drawing the proper rim of the pipe.

1
export class Pipe {
2
// ...
3
4
public draw(context: CanvasRenderingContext2D) {
+
context.drawImage(
+
this.spriteSheet,
+
this.rimSpriteData.sourceX,
+
this.rimSpriteData.sourceY,
+
this.rimSpriteData.width,
+
this.rimSpriteData.height,
+
this.position.x,
+
this.type === "top"
+
? this.height - this.rimSpriteData.height
+
: this.position.y,
+
this.rimSpriteData.width,
+
this.rimSpriteData.height
+
);
18
}
19
}

Let focus on the logic for the destination y position of the draw call. The rest we've seen before.

We draw the rim of the pipe at a slightly different y position, based on the type. When the type is "top", we need to offset the position of the draw call by the height of the rim sprite: height - rimSpriteData.height. When the type is "bottom", we don't need to perform any changes.

Recall that the destination position we provide to drawImage is the top left corner of the image, that's why we perform this adjustment.

If you look at the canvas, you should see the pipe rims drawn at the correct positions. Right in line with our reference lines.

Drawing the Pipe Body

Lastly we need to draw the body of the pipe.

1
export class Pipe {
2
public draw(context: CanvasRenderingContext2D) {
3
context.drawImage(
4
this.spriteSheet,
5
this.rimSpriteData.sourceX,
6
this.rimSpriteData.sourceY,
7
this.rimSpriteData.width,
8
this.rimSpriteData.height,
9
this.position.x,
10
this.type === "top"
11
? this.height - this.rimSpriteData.height
12
: this.position.y,
13
this.rimSpriteData.width,
14
this.rimSpriteData.height
15
);
16
+
if (this.type === "top") {
+
context.drawImage(
+
this.spriteSheet,
+
this.sliceSpriteData.sourceX,
+
this.sliceSpriteData.sourceY,
+
this.sliceSpriteData.width,
+
this.sliceSpriteData.height,
+
this.position.x,
+
0,
+
this.sliceSpriteData.width,
+
this.height - this.rimSpriteData.height
+
);
+
} else {
+
context.drawImage(
+
this.spriteSheet,
+
this.sliceSpriteData.sourceX,
+
this.sliceSpriteData.sourceY,
+
this.sliceSpriteData.width,
+
this.sliceSpriteData.height,
+
this.position.x,
+
this.position.y + this.rimSpriteData.height,
+
this.sliceSpriteData.width,
+
this.height - this.rimSpriteData.height
+
);
+
}
42
}
43
}

Let's start with the top. We need the body of the pipe to be drawn from a y position of 0, and a hieght of pipe height minus rimSpriteData.height. Try removing - this.rimSpriteData.height and you'll see how the body is now in front of the pipe rim. Drawing the body last was intentional to help callout potential rendering issues overlapping the rim.

When we draw the bottom, we need the body to be drawn from the y position and offset positively (down) by rimSpriteData.height with a height of pipe height minus rimSpriteData.height. Technically we don't need to subtract the rimSpriteData.height from the destination height. It would just draw off the bottom of the canvas, but we'll leave it for consistency sake.

Lets move on to adding some colliders.